Harsh light can be one of the toughest challenges in wedding photography, especially in Gypsum, CO, where the high-altitude sun creates intense conditions. Understanding how your photographer manages these harsh lighting situations makes the difference between images that fall flat and photos that truly capture your wedding day’s beauty. The mountain environment brings stunning scenery but also unique lighting challenges requiring expertise and creative problem-solving.
For couples planning celebrations in Gypsum, knowing what to expect from harsh sunlight helps you make informed decisions about timing, location selection, and working with your wedding photographer. This guide walks you through everything you need to know about dealing with harsh light in your wedding photos.
Understanding Harsh Light in Mountain Environments
Harsh light occurs when the sun creates strong, direct illumination, producing dark shadows and bright highlights with minimal transition. In Gypsum’s high-altitude setting, this effect intensifies because there’s less atmosphere to diffuse sunlight. The result? Extreme contrast that can be unflattering in portraits, washing out skin tones while creating harsh shadows under eyes, noses, and chins.
The challenge becomes particularly acute during midday hours when the sun sits directly overhead. This angle creates the least flattering light for portraits, casting shadows downward on subjects’ faces and making it difficult to capture even, beautiful skin tones. Years ago, photographers simply avoided shooting during these times. Today, professional photographers have developed techniques to create stunning images even in the brightest conditions.
Mountain weddings present situations where the surrounding landscape—the very reason you chose this location—can intensify lighting challenges. Reflective surfaces like snow or light-colored rocks bounce additional light onto subjects, while a thin atmosphere provides less natural diffusion.
Camera Techniques for Managing Bright Light
Exposure Control
Professional photographers employ various camera techniques to manage harsh sunlight effectively. Shooting in manual mode gives photographers full control over their camera’s response to bright light. They can adjust shutter speed and other settings to maintain control, preventing blown-out highlights or muddy shadows.
Key technical approaches include:
- Underexposing slightly to preserve highlight detail in the bride’s dress and sky
- Lifting shadows in post-processing without sacrificing image quality
- Using spot metering to expose correctly for the subjects’ faces rather than the bright background
- Adjusting ISO and aperture to balance the exposure triangle perfectly
Flash in Daylight
Using flash even in bright daylight might seem counterintuitive—why add more light to an already bright scene? The answer lies in the fill flash technique, where photographers use off-camera flash to fill in harsh shadows on subjects’ faces, creating even illumination. This requires expertise to execute well, as poorly done flash looks obvious and unnatural.
Finding and Using Open Shade Effectively

Open shade represents one of the most powerful tools for dealing with harsh light. It refers to areas shielded from direct sunlight but still receiving soft, diffused light from the open sky.
Best open shade locations:
- Shadow side of buildings
- Under covered porches or overhangs
- Beneath large tree canopies
- Mountain valleys that block direct sun
- Between structures that create natural shade
The key is finding locations where subjects aren’t standing in direct light but aren’t in complete darkness either. The soft, directional light from the sky creates gentle shadows that add dimension without harsh contrast. Skin tones appear natural and even, and eyes remain visible and engaging.
When scouting your Gypsum wedding location, pay attention to areas with natural shade. Professional photographers in the area know exactly where to find these pockets of beautiful light at different times of day.
Strategic Positioning and Angle Selection
The angle at which light hits your subjects makes an enormous difference in how they photograph. Even in harsh lighting situations, photographers can position subjects to minimize unflattering shadows.
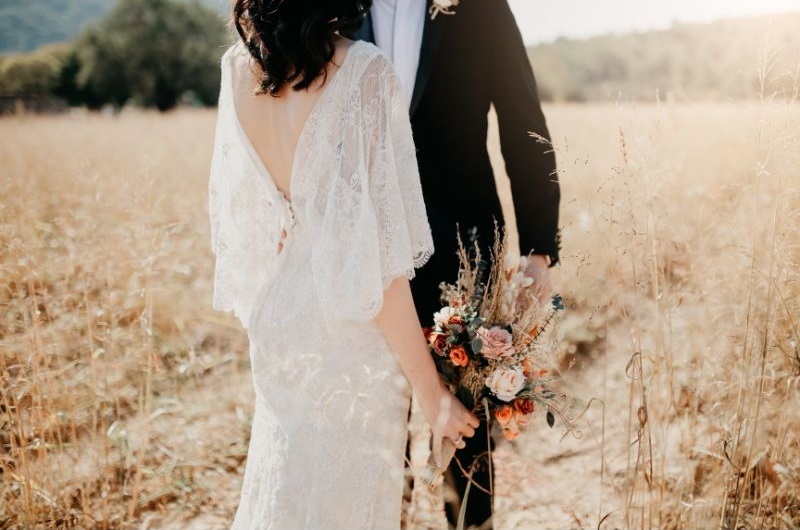
Backlighting Techniques
By positioning the couple so the sun is behind them, photographers can create a beautiful rim light effect that adds glow while keeping faces in relative shade. This technique requires careful exposure to ensure subjects’ faces aren’t too dark, but when executed well, it produces romantic, dreamy images with gorgeous light wrapping around the couple.
45-Degree Positioning
Rather than facing directly into harsh light (which causes squinting) or having it directly overhead (which creates shadows), photographers might position couples at a 45-degree angle to the light source. The right side might receive more light than the left, but this adds shape and depth rather than creating harsh illumination.
Working with Midday Ceremonies
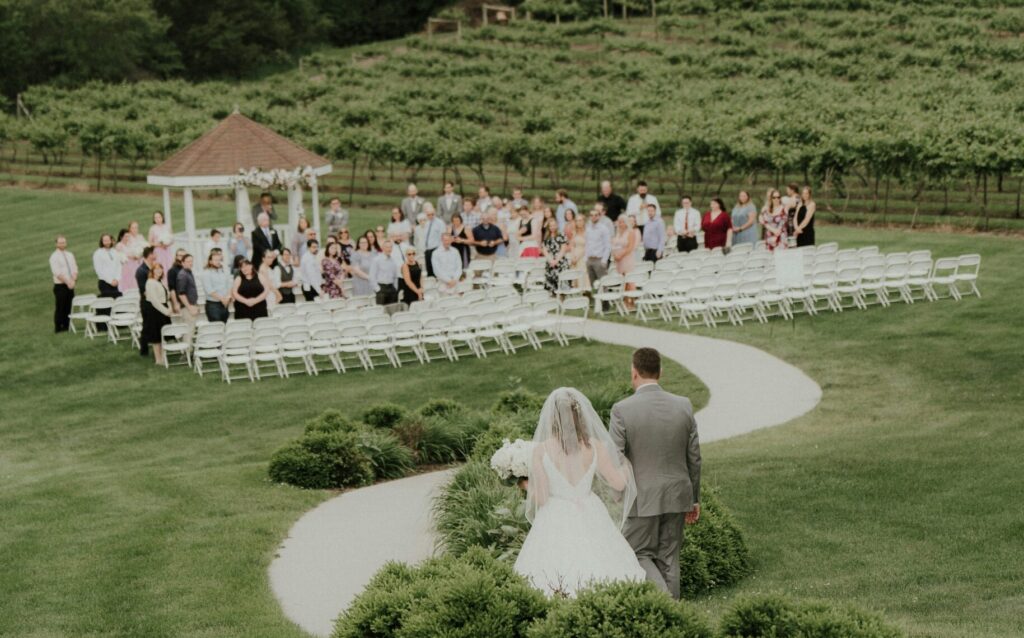
Many weddings in Gypsum take place during midday hours, especially in summer when venues book multiple events. While this timing presents lighting challenges, it doesn’t mean your ceremony photos will suffer.
Midday ceremony strategies:
- Shoot from angles that minimize overhead sun impact
- Capture the first kiss with backlighting
- Find compositions where the ceremony backdrop provides shade
- Use a second shooter for multiple lighting angles
- Position to avoid direct sunlight hitting subjects’ faces
Indoor ceremonies or those under covered structures eliminate harsh light concerns, but many couples choose outdoor settings for mountain views. If your heart is set on an outdoor midday ceremony, discuss lighting concerns with your photographer during planning. They can visit the location at the same time of day to develop a specific strategy.
Using Professional Light Modifiers
Diffusers
Professional wedding photographers often work with assistants who can hold diffusers to modify harsh light. A diffuser placed between the sun and your subjects softens the bright light, creating the effect of a cloud passing overhead even on completely clear days.
Reflectors
Reflectors bounce light back onto shadowed areas. Options include:
- White reflectors: Natural, soft fill light
- Silver reflectors: Bright, cool-toned fill
- Gold reflectors: Warm, flattering for skin tones (use carefully to avoid orange cast)
Not all photographers travel with these modifiers or have additional hands needed to position them effectively. This is one reason to search for wedding photographers who come prepared for any lighting situation and work with assistants or second shooters.
Post-Processing for Harsh Light Images
Even with perfect technique during the shoot, post-processing plays a crucial role in delivering the best images from harsh lighting situations. Modern editing software gives photographers powerful tools to manage extreme contrast.
Essential post-processing techniques:
- Graduated adjustments to balance bright skies with properly exposed faces
- Highlight recovery to preserve detail in white dresses and bright backgrounds
- Shadow lifting to reveal details without creating noise
- Skin tone correction to ensure a natural, flattering appearance
- Selective dodging and burning for dimensional portraits
Professional photographers spend considerable time in post-processing to ensure skin appears natural across all images, regardless of lighting conditions when the photo was taken. This attention to detail separates professional work from amateur attempts.
Planning Your Timeline Around Light
While professional photographers can work in any conditions, strategic timeline planning minimizes exposure to the harshest light and maximizes opportunities for beautiful portraits.
Morning Light (Sunrise to 10 AM)
Morning hours offer soft, warm illumination perfect for getting-ready photos and early portraits. Consider a first look during these morning hours rather than saving all portraits for after the ceremony. This front-loads your best light and removes time pressure.
Harsh Midday (11 AM to 2 PM)
This period presents the greatest challenges. If possible, schedule indoor activities during these hours—cocktail hour, lunch, or venue preparations rather than outdoor photography sessions.
Golden Hour (Late Afternoon)
The most sought-after light for wedding photography. Schedule your ceremony to finish with enough time for portrait sessions during this magical window. Your photographer can advise on the best timing for your specific date.
Learn more about creating an effective wedding photography timeline that accounts for lighting considerations.
Location Selection Strategies
The specific locations you choose for various parts of your wedding day significantly impact how harsh light affects your photos.
Ideal location features:
- Mix of open areas for dramatic shots and shaded spots for portraits
- Natural features that moderate intense sunlight (valleys, trees, structures)
- Variety allowing photographers flexibility with changing light conditions
- Understanding of how sun moves across the space throughout the day
A ceremony site perfectly shaded at noon might be in full sun by 2 PM. Understanding these patterns helps you choose the right spot for the right time. Many experienced venue coordinators and local photographers can provide insights about how light interacts with various spaces.
Tips for Couples During Bright Light Sessions
Beyond what photographers do technically, couples can take actions that improve results in harsh lighting situations.
Practical tips:
- Avoid squinting: Keep eyes closed between shots, open them just before the photographer captures the image
- Trust your photographer’s positioning: What looks oddly shadowed to your eye might photograph beautifully
- Stay hydrated: Bright light means heat—bring water to portrait sessions
- Have touch-up supplies ready: Harsh light can emphasize shine on skin
- Relax your face: Tension shows more in bright light conditions
Posing for wedding photos becomes easier when you understand these basics and trust your photographer’s guidance.
Handling Wedding Party and Family Portraits
Family portraits and wedding party group shots present additional challenges because you’re dealing with multiple faces that all need flattering illumination.
Group Photography Solutions
- Find or create shade large enough for groups
- Use shadow side of buildings
- Position strategically so everyone receives similar lighting
- Work efficiently to minimize time away from celebration
- Photograph smaller groups separately if necessary for better light
Professional photographers experienced with harsh light conditions work quickly and confidently, knowing exactly where to position people without wasting time on test shots. This efficiency comes from years of experience dealing with these exact situations.
Flash Techniques for Outdoor Portraits
Using flash in daylight is one of the most effective tools for managing harsh light. By adding carefully controlled flash to fill in shadows created by bright sunlight, photographers create even illumination that looks completely natural.
High-speed sync flash benefits:
- Fills harsh shadows on faces
- Balances extreme contrast between highlights and shadows
- Allows shooting at wider apertures even in bright light
- Creates dimension and separation from background
- Makes subjects stand out against bright skies
The key is making the flash invisible—the goal isn’t to create an obviously lit look but rather to subtly fill shadows. When done correctly, viewers don’t realize flash was used at all. This invisible use of flash represents advanced technique that separates experienced professionals from other photographers.
Evaluating Photographers’ Harsh Light Work
As you search for wedding photographers and review portfolios, knowing what to look for in harsh light images helps you evaluate skill levels.
Quality indicators in bright light photography:
- Even skin tones without harsh shadows under eyes or noses
- Detail preserved in both bright and dark areas
- Natural look rather than overly processed appearance
- Properly exposed subjects even against bright backgrounds
- Sky detail visible rather than blown out to pure white
- Shadow areas showing detail rather than going to pure black
Pay attention to how photographers handle bright skies in their images. Style preferences vary, and some photographers deliberately embrace high contrast for artistic effect. The difference lies in whether high contrast is intentional and controlled or simply a result of not knowing how to manage harsh light.
Reviewing a photographer’s full portfolio, including real weddings shot in various conditions, gives you the clearest picture of their capabilities.
Learning From Professional Experience
Professional photographers who have been shooting weddings for years have encountered every possible lighting scenario. The photographer who’s shot at your venue dozens of times knows exactly where the harsh light will be at 2 PM in July and has a plan to work around it.
This experience becomes your asset. Don’t hesitate to lean on this expertise during planning. Ask potential photographers what they’ve learned about lighting at your specific venue. Request examples of how they’ve handled similar challenging situations. A photographer confident in their abilities will happily discuss their approach and show you proof of success in difficult conditions.
The world of wedding photography is vast, with photographers at every skill level. While budget matters, remember that photographs are the primary tangible item you’ll keep from your wedding day. Investing in a photographer who can deliver consistently beautiful images regardless of lighting conditions provides peace of mind.
Comparing Different Photography Approaches

Interestingly, if you put other photographers in identical harsh lighting situations, you’d see varied approaches to solving the same problem.
Common approach variations:
- Natural light purists: Rely exclusively on finding shade and working with available light
- Flash-forward shooters: Embrace flash techniques to overpower the sun
- Hybrid approach: Combine multiple techniques depending on the moment
- Post-processing heavy: Capture multiple exposures and blend in editing
There’s no single “right” way to photograph in harsh light. What matters most is that the photographer’s approach aligns with your style preferences and consistently delivers high-quality results. For example, photographers who spent careers shooting on the East Coast might have different techniques than those who’ve always worked in mountain environments.
The advantage goes to photographers with extensive experience in the specific environment where your wedding will take place, including those familiar with Gypsum wedding photography.
Technical Details That Matter
Small details in execution can significantly impact results when dealing with harsh light.
Equipment Considerations
- Professional lenses: Handle extreme contrast better, maintaining detail in highlights and shadows
- Camera dynamic range: Professional cameras capture a wider range of brightness levels
- Backup equipment: Ensures no missed moments if gear fails in challenging conditions
Post-Processing Investment
Properly editing harsh light photos takes longer than working with images captured in ideal conditions. Photographers who rush through editing or rely too heavily on batch processing won’t deliver the careful attention these images require. This is one sign that a photographer truly understands the craft—they’re willing to put in the detailed work necessary to optimize each important image.
Even the specific lens a photographer uses matters—some handle extreme contrast better than others. Professional-grade lenses generally outperform consumer options in these challenging conditions, which is one reason professionals invest heavily in equipment. This represents a bit of the difference between someone running photography as a side hustle versus a dedicated professional who has spent years building their toolkit.
Conclusion
Dealing with harsh light wedding photos for Gypsum, CO, couples requires a combination of technical skill, creative problem-solving, and strategic planning. While challenging lighting conditions are common in mountain environments, they don’t have to compromise the beauty of your wedding photography. Understanding how professional photographers work with bright light, direct sunlight, and harsh shadows empowers you to make informed decisions that lead to stunning results.
Ready to work with photographers who excel at capturing beautiful images in any lighting condition?
Celeste Wedding Photography brings years of experience photographing weddings in Gypsum and throughout Colorado’s mountain communities. We understand the unique challenges of high-altitude lighting and have refined our techniques to consistently deliver stunning images, whether you’re celebrating in perfect golden hour light or bright midday sun. We shoot with professional equipment, work with a second shooter when needed, and invest significant time in post-processing to ensure every image meets our standards.
Frequently Asked Questions
What’s the worst time of day for wedding photos in harsh light?
Midday hours between 11 AM and 2 PM present the harshest conditions, with the sun overhead creating unflattering shadows on subjects’ faces. However, skilled photographers can still create beautiful images using shade, flash, or creative positioning.
Should we avoid outdoor ceremonies because of harsh light concerns?
No. Professional photographers have proven techniques for managing bright conditions. Discuss lighting with your photographer during planning so they can prepare appropriate strategies for your specific location and timing.
How much does post-processing help with harsh light photos?
Post-processing is essential for optimizing harsh light images. Skilled editing can balance exposure, even out skin tones, and recover detail in both highlights and shadows. However, it works best when the photographer captures properly exposed images during the shoot.
Do we need a second shooter specifically for harsh light situations?
While not necessary specifically for harsh light, a second shooter provides multiple angles during key moments like your ceremony or first kiss, increasing the likelihood that at least one photographer captures images with more favorable lighting angles throughout your day.
Can we request a specific style for handling harsh light?
Absolutely. Discuss your preferences—whether you prefer dramatic backlit images, soft even lighting from shade, or other approaches. Good photographers adapt their techniques to match your vision while ensuring technically sound results that deliver beautiful images. Contact us to discuss your wedding plans and learn how we approach lighting challenges to create the gorgeous, natural-looking photos you deserve.